两款优秀的服务器网络流量监控工具:Ntopng和Munin-功能强大直观
如果发现自己的VPS服务器异常,一般地我们可以从服务器日志中来分析,看看是不是有不守“规矩”的IP来源。例如,我们可以使用服务器日志分析利器:ngxtop和GoAccess来分析统计日志当中的IP来源、连接数量、错误请求、浏览器、流量带宽等等。
同时,对于一些复杂的网站应用还可以从服务器的网络流量中分析异常原因。本篇文章就来分享两个非常实用的服务器网络流量监控工具:ntopng和Munin。ntopng是NTOP的新一代版本,官方原先版本的NTOP已经不再更新,新的ntopng在监控网络数据传输、排除网络故障方面功能十分强大。
ntopng通过分析网络流量来判断网络上存在的各种问题,还可以监控是否有黑客正在攻击网络,如果网络突然变缓慢,通过Ntop截获的数据包,可以确定是什么类型的数据包占据了大量带宽,以及数据包的发送时间、数据包传送的延时、数据包的来源地址等。
另一款优秀的服务器监控工具Munin,是一款类似 RRD tool 的非常棒的系统监控工具,它能提供给你多方面的系统性能信息,例如 磁盘、网络、进程、系统和用户,Munin可以将这些信息生成Html网页,这样你可以直接通过网页来浏览各类监控数据,Munin同样支持主从模式监控。
作为一名草根站长,掌握一定的站长工具是十分有用的,尤其是在自己的服务器遇到“攻击”时这些“利器”就可以发挥它的防御能力了。
- 服务器日志分析利器:ngxtop和GoAccess-实时监控可视化管理快速找出异常来源
- Smokeping安装与配置-免费开源网络性能监控工具可视化主/从部署
- 三个命令工具Rsync,SCP,Tar-快速解决VPS远程网站搬家与数据同步
一、ntopng安装与使用
1.1 安装前准备
官网:
- http://www.ntop.org/
以Ubuntu 16.04作为演示,在开始安装前,先升级一下:
sudo apt-get update -y
sudo apt-get upgrade -y
sudo shutdown -r now
1.2 安装Ntopng
直接使用命令安装即可:
sudo apt-get install ntopng
1.3 配置Ntopng
配置文件位于: /etc/ntopng.conf.
sudo vim /etc/ntopng.conf
根据你自己的需要来修改配置:
# DO NOT REMOVE the following option, required for daemonization.
-e=

# * Interfaces to sniff on: one interface per line, prefix with -i=
# If none is specified, ntopng will try to auto-detect the best interface.

-i=eth0

# * Port on which ntopng will listen for the web-UI.
-w=3000
保存配置文件,然后重启 ntopng :
sudo systemctl restart ntopng
ntopng还提供非常多的选项,你可以使用 ntopng -h 来查看:
sudo ntopng -h
1.4 开启端口
你需要在VPS的防火墙中开启相应的端口,例如上面用了3000,那么你就需要在防火墙规则中加入:
sudo ufw allow 3000
1.5 Ntopng使用
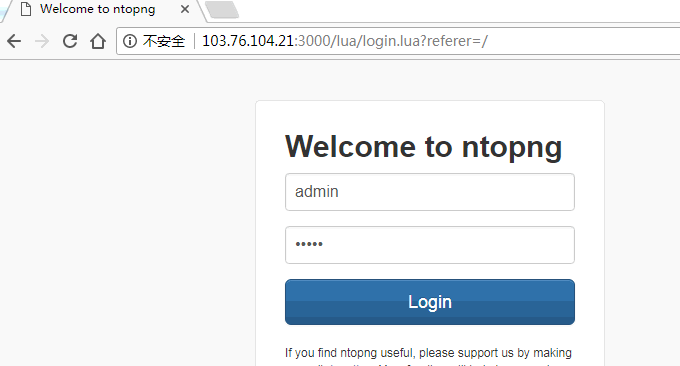
打开你的浏览器,访问IP+端口号,你就可以看到Ntopng的登录界面了,使用默认的用户名 admin 和密码 admin 登录即可。
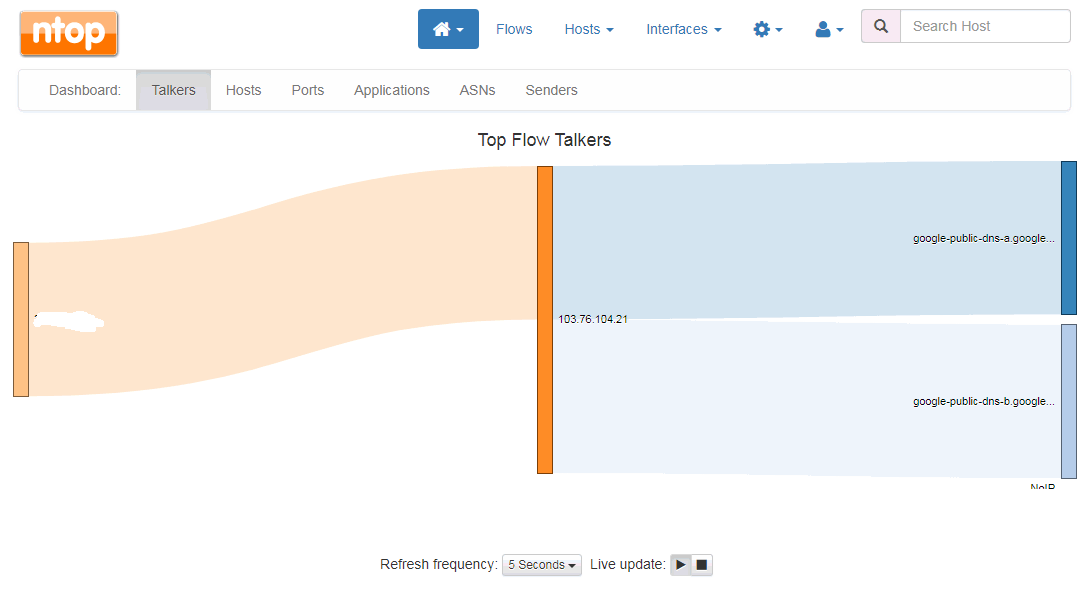
Ntopng提供了非常漂亮的网络流量图。
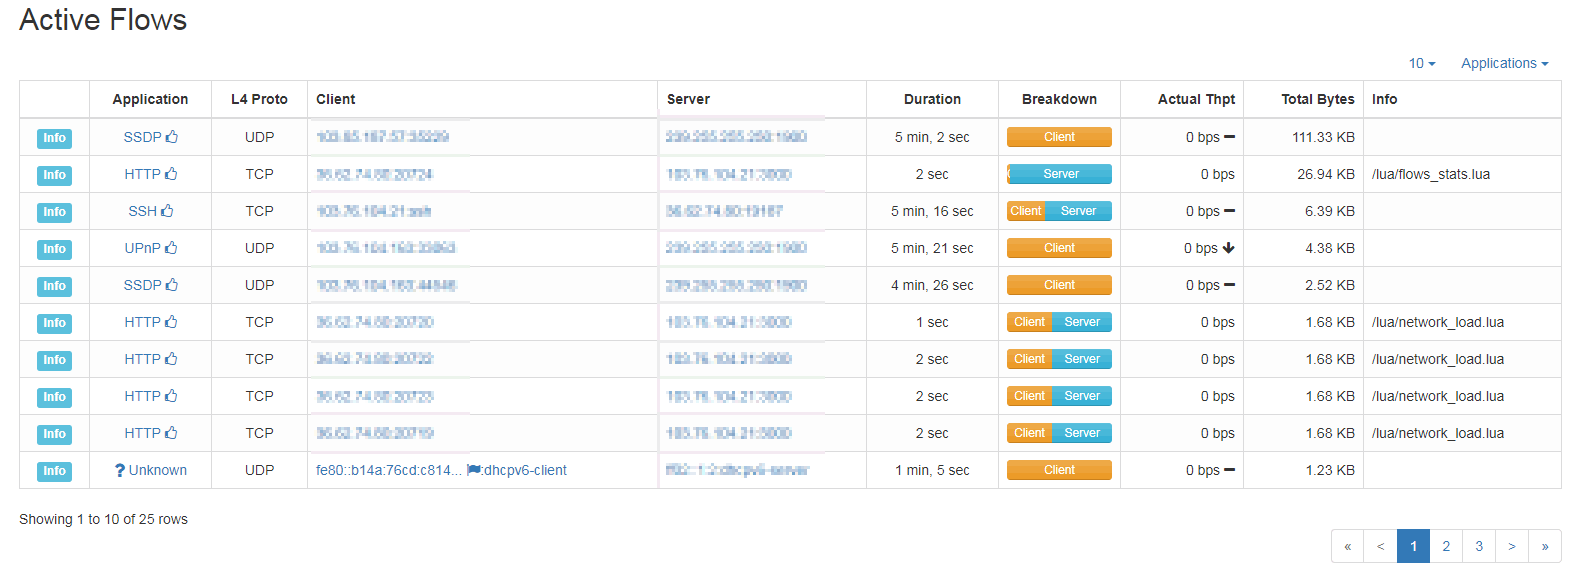
点击还可以查看实时的连接数据分析,包括IP地址、上传下载速度、协议、进程等等。
Ntopng还有丰富的图表可供可选择,例如按照IP地址、网络连接客户端、操作系统、Mac地址等列出流量分析图。

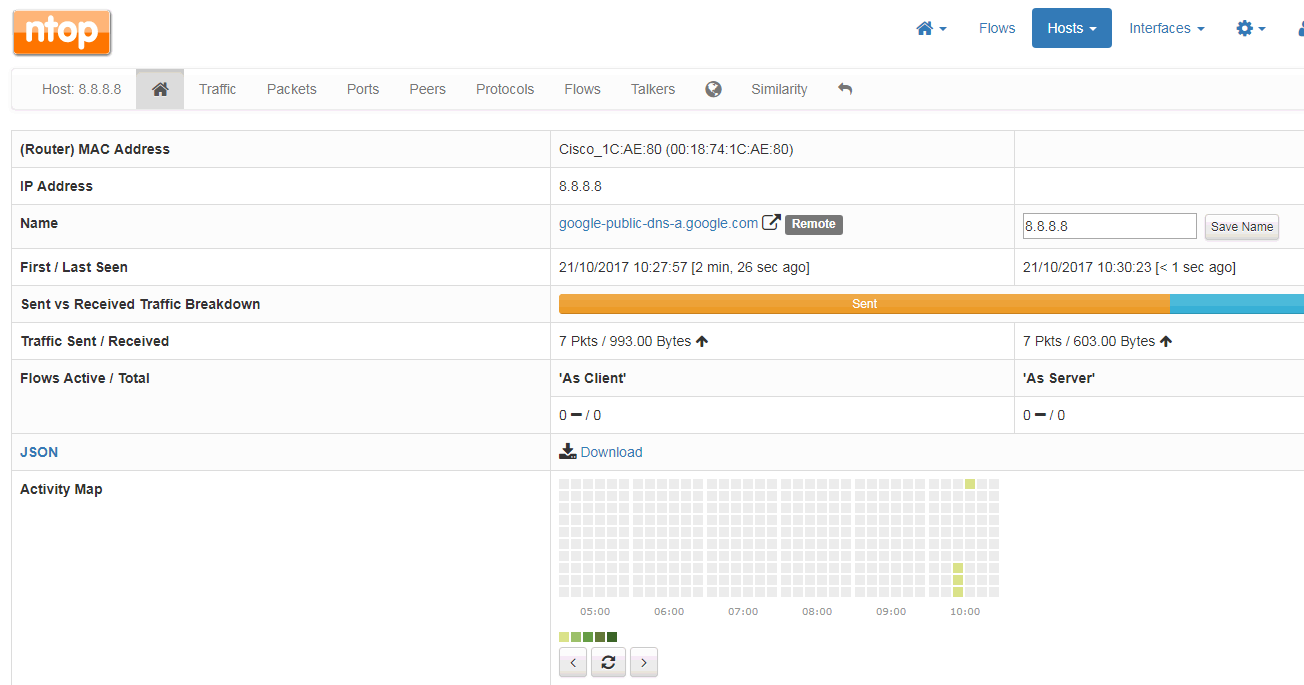
如果你对于某一个连接感兴趣,可以点击进入到查看详情页面,这里Ntopng会显示出当前IP连接服务器的详细信息,例如时间、协议、上传、下载、Mac等。(点击放大)
Ntopng还有一些常规的统计汇总,例如端口占用情况统计汇总。

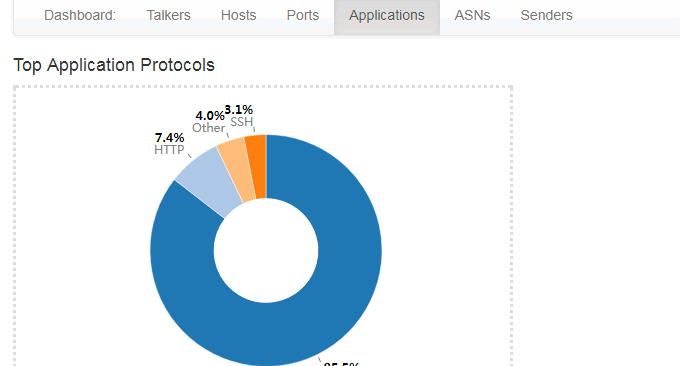
还有应用统计汇总。
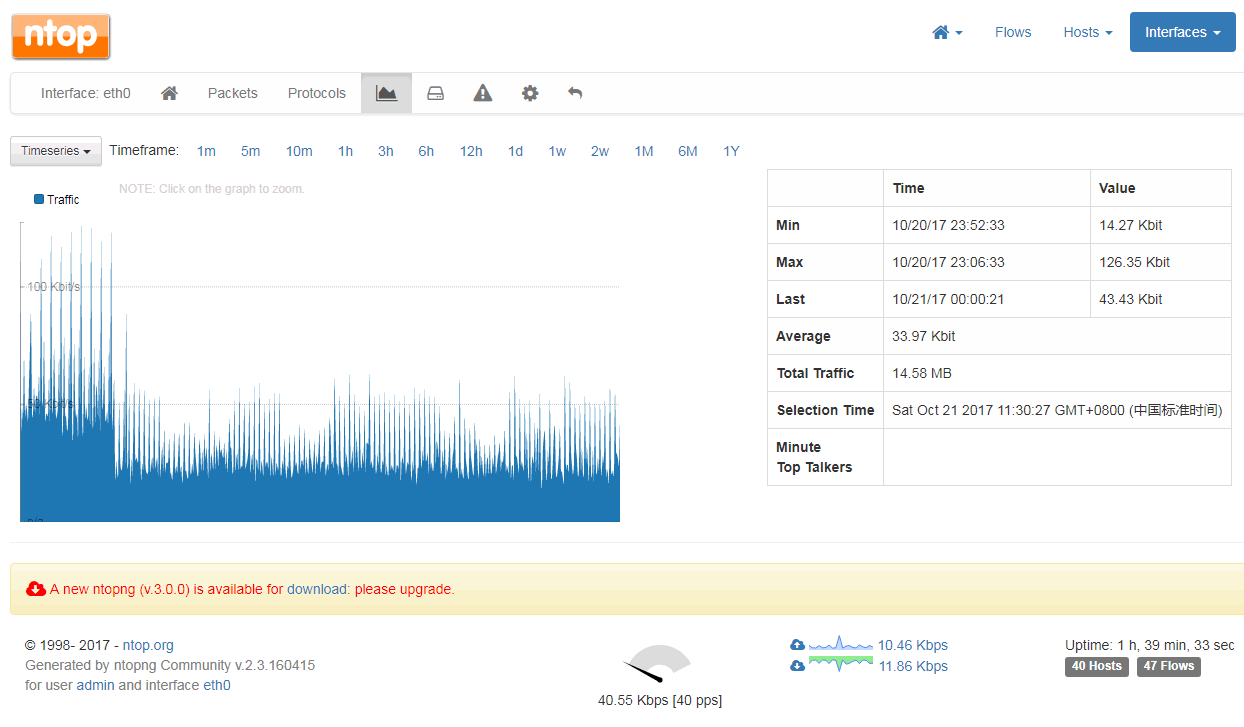
还的按照时间存档统计汇总的网卡流量情况,从5分钟到1年都可以,包括实时流量统计。你只需要点击你想要显示的时间线。(点击放大)
二、Munin安装与使用
官网:
- http://munin-monitoring.org/
2.1 快速安装Munin
如果你的服务器已经配置好Web环境,那么你只需要安装Munin即可,如果是Debian或者Ubuntu系统:apt-get install munin munin-node,如果是Redhat或者CentOS系统:yum install munin munin-node。
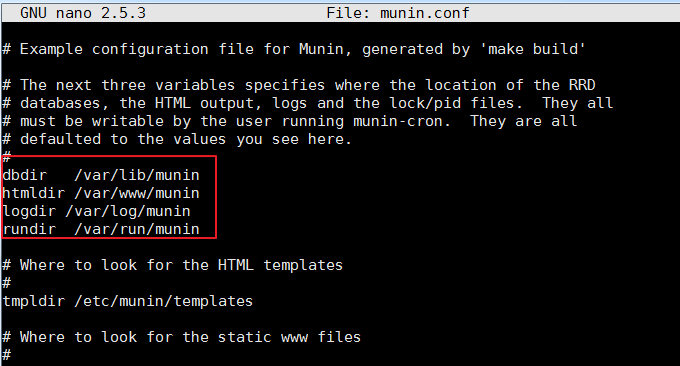
然后打开munin的主配置文件:/etc/munin/munin.conf,htmldir /var/www/munin 是Web访问的路径,你可以将些路径指定到一个可以直接使用Web访问的地方。
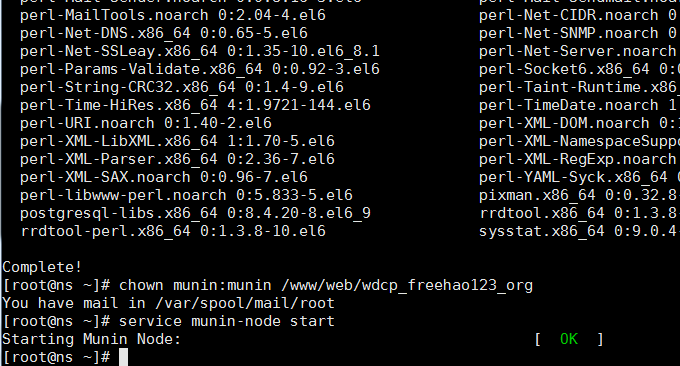
指定好Web访问目录后,需要将目录权限设置为munin,否则munin无法写入数据。命令:chown -R munin:munin /home/wwwroot/monin
最后,等上半个小时,打开你的网站你就可以看到munin的监控图表数据了。
2.2 手动安装Munin
假如你没有安装Web环境,例如LNMP、Oneinstack,那么你采用手动安装Apache和Munin的方法。这里以 CentOS 和 Fedora为演示:
2.3 安装 EPEL Repository
使用以下命令安装:
RHEL/CentOS 7
------------------ RHEL/CentOS 7 - 64-Bit ------------------
# wget http://dl.fedoraproject.org/pub/epel/7/x86_64/e/epel-release-7-9.noarch.rpm
# rpm -ivh epel-release-7-9.noarch.rpm
RHEL/CentOS 6
------------------ RHEL/CentOS 6 - 32-Bit ------------------
# wget http://download.fedoraproject.org/pub/epel/6/i386/epel-release-6-8.noarch.rpm
# rpm -ivh epel-release-6-8.noarch.rpm
------------------ RHEL/CentOS 6 - 64-Bit ------------------
# wget http://dl.fedoraproject.org/pub/epel/6/x86_64/epel-release-6-8.noarch.rpm
# rpm -ivh epel-release-6-8.noarch.rpm
RHEL/CentOS 5
------------------ RHEL/CentOS 5 - 32-Bit ------------------
# wget http://download.fedoraproject.org/pub/epel/5/i386/epel-release-5-4.noarch.rpm
# rpm -ivh epel-release-5-4.noarch.rpm
------------------ RHEL/CentOS 5 - 64-Bit ------------------
# wget http://download.fedoraproject.org/pub/epel/5/x86_64/epel-release-5-4.noarch.rpm
# rpm -ivh epel-release-5-4.noarch.rpm
安装好了升级一下:
------------------ On RHEL and CentOS Only ------------------
# yum -y update
2.4 安装Apache
Munin 需要 Apache 或者 Nginx 来提供静态Html访问,我们以安装Apache为例:
------------------ On RHEL, CentOS and Fedora ------------------
# yum install httpd
------------------ On Fedora 22+ Releases ------------------
# dnf install httpd
Apache安装好了后设置一下开机自启动.
------------------ On RHEL, CentOS and Fedora ------------------
# service httpd start
# chkconfig --level 35 httpd on
------------------ On RHEL/CentOS 7 and Fedora 22+ ------------------
# systemctl enable httpd
# systemctl start httpd
2.5 安装Munin 和 Munin-Node
安装 Munin 和 Munin-Node 直接使用以下命令:
------------------ On RHEL, CentOS and Fedora ------------------
# yum -y install munin munin-node
------------------ On Fedora 22+ Releases ------------------
# dnf -y install munin munin-node
Munin安装好了后,你就可以开始编辑Munin配置文件了,以下是Munin相关功能的目录:
/etc/munin/munin.conf : Munin 配置文件.
/etc/cron.d/munin : Munin 定时文件.
/etc/httpd/conf.d/munin.conf : Munin Apache 配置文件.
/var/log/munin : Munin 日志.
/var/www/html/munin : Munin web 目录.
/etc/munin/munin-node.conf : Munin 从属节点配置文件.
/etc/munin/plugins.conf : Munin plugins 配置文件.
最后,重启 Munin 并设置开机自动启动:
------------------ On RHEL, CentOS and Fedora ------------------
# service munin-node start
# chkconfig --level 35 munin-node on
------------------ On RHEL/CentOS 7 and Fedora 22+ ------------------
# systemctl enable munin-node
# systemctl start munin-node
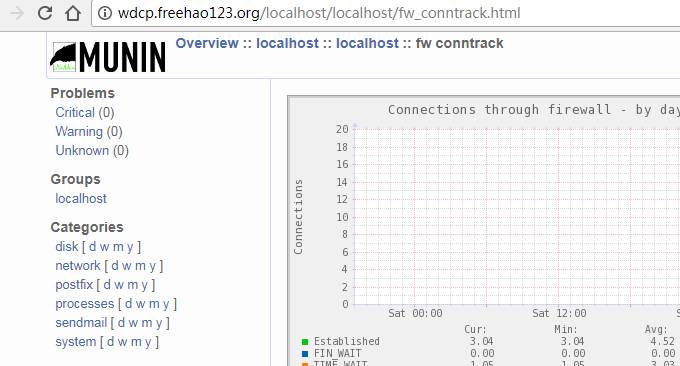
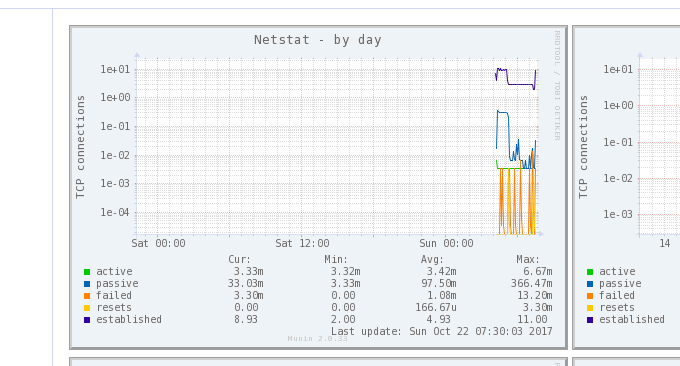
打开浏览器你就可以看到Munin监控的数据图表了。
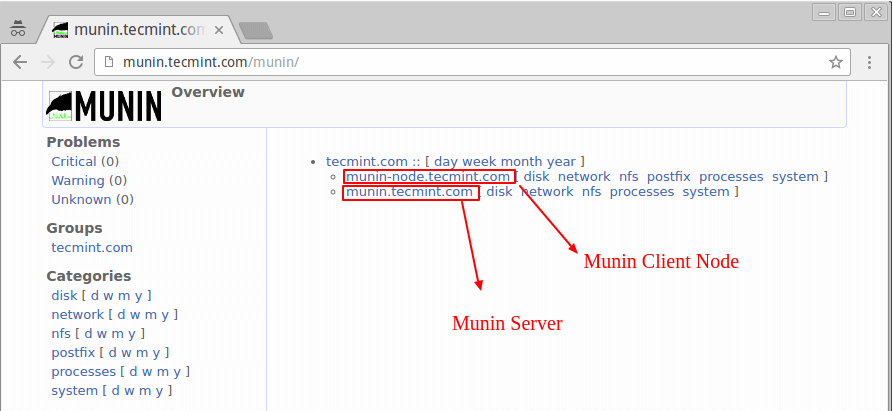
2.6 Munin监控多台服务器状态
进入你的另一台VPS主机,你只需要安装 munin-node 即可:
# yum install munin-node
# dnf install munin-node      [On Fedora 22+ versions]
# apt-get install munin-node  [On Debian based systems]
接着打开 /etc/munin/munin-node.conf ,添加你的munin 主机服务器 IP .
# vi /etc/munin/munin-node.conf
假设你的Munin主服务器的IP是192.168.0.103,格式如下:
# A list of addresses that are allowed to connect.
allow ^127\.0\.0\.1$
allow ^::1$
allow ^192\.168\.0\.103$
重启munin client:
------------------ On RHEL, CentOS and Fedora ------------------
# service munin-node start
# chkconfig --level 35 munin-node on
------------------ On RHEL/CentOS 7 and Fedora 22+ ------------------
# systemctl enable munin-node
# systemctl start munin-node
现在在你的Munin主服务器中打开: /etc/munin/munin.conf 添加你的client node ,主要是名称还有IP地址:
# a simple host tree
[munin.wzfou.com]
address 127.0.0.1
use_node_name yes
[node.wzfou.com]
address 192.168.0.15
use_node_name yes
最后,重启munin server 打开 http://munin.wzfou.com/munin 就可以看到主从节点的监控数据图表了。
三、总结
Ntopng和Munin都是非常优秀的网络监控工具,都可以生成图表供在线浏览,但是两个工具各有侧重点,Ntopng可以说是网络流量的专业级的监控,你甚至可以在Ntopng中看到网络连接客户端的各种信息,这对于分析网络攻击十分有用。
Munin可以说是一个综合性的服务器性能监控平台,除了可以得到网络流量等信息,还可以看到硬盘容量、IO读写、CPU使用、内存占用等各类信息,比较适合用于服务器的全方位监控。Munin生成的数据图表如果你不想公开的话,可以利用Apache设置访问密码。
文章出自:挖站否 https://wzfou.com/ntopng-munin/,部分内容参考自:tecmint.com 版权所有。本站文章除注明出处外,皆为作者原创文章,可自由引用,但请注明来源。


关于站长(Qi),2008年开始混迹于免费资源圈中,有幸结识了不少的草根站长。之后自己摸爬滚打潜心学习Web服务器、VPS、域名等,兴趣广泛,杂而不精,但愿将自己经验与心得分享出来与大家共勉。


猜你喜欢


-
-

是这样的。
2025年1月17日 10:47
-
-

有没有win下的监控推荐?
2018年1月8日 11:27-
平时好少见,我去找找有没有免费的监控软件。
2018年1月8日 13:07
-
-

munin.wzfou.com
这个范例域名已经无法解析了…2017年12月29日 18:41-
是的,之前做演示用的。
2017年12月29日 21:14
-
-

😀 谢啦
2017年12月29日 15:55 -
站长可以交换下友链吗?我的是https://www.echoteen.com,我可是跟着你从freehao免费的走过来的,啊哈哈,只是现在不用免费的东西了
已添加您的链接了,请您审核下2017年12月29日 10:45-
可以的,我等下就来添加。
2017年12月29日 13:52
-
-

这是检验我English是不是蒙混过关的。
2017年12月28日 23:25-
英语只要过了四六级即可。 😀
2017年12月29日 21:41
-
-

qi用的是什么邮件订阅系统
2017年12月28日 21:10-
用的是这个:https://wzfou.com/mailpoet/
2017年12月29日 21:42-
感觉挺不错的
2017年12月29日 23:52
-
-
-

有汉化的就好了。
2017年12月28日 17:31-
目前还没有,只能自己手动调整语言了。
2017年12月28日 17:47
-
-

可能是没有BUG或者其他功能更新,所以没更新吧。现在的软件也是这样,只要不是功能和BUG,就不更新了。
2017年12月28日 16:39-
总体来说这个监控是非常好了。
2017年12月28日 17:46
-
-

还不如用阿里云第三方的监控好一些。
2017年12月28日 09:23 -

Munin 颜值没 Ntopng 高,哈哈哈哈哈
2017年12月28日 09:12-
Munin 好久没有更新了,貌似好几年前也是这样的。
2017年12月28日 15:40
-
-

配置Ntopng 的代码是不是少写了nano或者VIM
2017年12月27日 23:38-
谢谢,已经更新。
2017年12月28日 15:42
-
-

功能很强大!
2017年12月27日 22:03
这两个软件都是监控本机的吧,smokeping侧重在检测远程连接对不?谢谢!