启用CDN后网站获取用户真实IP:Cloudflare CDN真实IP地址(Nginx,Apache)
近期在其云否维护客户的网站时,客户要求屏蔽国外IP的访问,因为从日志来看攻击的IP大部分都是来自国外,并且自己的目标用户为国内,所以只允许国内的IP访问网站可阻止绝大多数的CC和DDoS攻击。实际测试后,发现效果还是不错,攻击想要再次攻击成本增加了不少。
不过,随后发现了一个问题,就是使用了Cloudflare CDN后,网站获取到的IP地址都是Cloudflare的CDN节点的,不能得到真实用户的IP地址,防御效果大大折扣。好在Cloudflare已经为我们想到这一点了,将访问者的 IP 地址包含在 X-Forwarded-For 标头和 CF-Connecting-IP 标头。
有了 X-Forwarded-For 标头,如果是Nginx可以使用ngx_http_realip_module模块,如果是Apache,则可以使用mod_remoteip模块来获取用户的真实IP。本篇文章就来分享一下如何编译和启用ngx_http_realip_module模块和mod_remoteip模块来获取用户的真实IP地址。

一般来说CDN厂商都采用了X-Forwarded-For和X-Real_IP等标准协议,所以本文介绍了获取用户真实IP的访问基本上适用于其它的CDN厂商。更多的关于CDN加速和服务器优化加速的方法,这里有:
- Cloudflare Partner接入管理Cloudflare CDN-启用Railgun动态加速
- 又拍云CDN加速申请使用教程-一键镜像,静态动态CDN和免费SSL
- WordPress开启Nginx fastcgi_cache缓存加速方法-Nginx配置实例
一、Nginx编译ngx_http_realip_module
1.1 Oneinstack编译
如果用的是Oneinstack一键包,则可以用以下命令来编译ngx_http_realip_module:
#下编译安装nginx的时候,都编译安装的哪些模块
[root@wzfoume ~]# nginx -V
nginx version: nginx/1.14.2
built by gcc 4.4.7 20120313 (Red Hat 4.4.7-23) (GCC)
built with OpenSSL 1.1.1a  20 Nov 2018
TLS SNI support enabled
configure arguments: --prefix=/usr/local/nginx --user=www --group=www --with-http_stub_status_module --with-http_v2_module --with-http_ssl_module --with-http_gzip_static_module --with-http_realip_module --with-http_flv_module --with-http_mp4_module --with-openssl=../openssl-1.1.1a --with-pcre=../pcre-8.42 --with-pcre-jit --with-ld-opt=-ljemalloc

#进入到oneinstack的nginx安装目录下,如果没有请先解压
[root@wzfoume src]# cd /root/oneinstack/src
[root@wzfoume src]# tar xzf nginx-1.14.2.tar.gz
[root@wzfoume src]# cd /root/oneinstack/src/nginx-1.14.2
[root@wzfoume nginx-1.14.2]# ./configure --prefix=/usr/local/nginx --user=www --group=www --with-http_stub_status_module --with-http_v2_module --with-http_ssl_module --with-http_gzip_static_module --with-http_realip_module --with-http_flv_module --with-http_mp4_module --with-openssl=../openssl-1.1.1a --with-pcre=../pcre-8.42 --with-pcre-jit --with-ld-opt=-ljemalloc --with-http_realip_module

make

#如果出现错误,应该是依赖路径不对,请cd ..到上一个目录解压相应的软件
tar xzf pcre-8.42.tar.gz
tar xzf openssl-1.0.2q.tar.gz
tar xzf openssl-1.1.1a.tar.gz

#编译完成,备份原先配置,然后替换nginx二进制文件
mv /usr/local/nginx/sbin/nginx{,_`date +%F`}  #备份nginx
cp objs/nginx /usr/local/nginx/sbin

#查看是否已经把http_realip_module模块加入进去
nginx -V
1.2 LNMP编译
如果你用的是LNMP一键包,在lnmp安装目录下找到lnmp.conf编辑它,在Nginx_Modules_Options里加上realip,保存后执行./upgrade.sh nginx来升级下Nginx就可以了。命令如下:
Nginx_Modules_Options='--with-http_realip_module'
1.3 BT宝塔面板
如果你用的是BT宝塔面板,可以使用以下命令来编译ngx_http_realip_module:
#宝塔面板安装模块

#先查看一下本机的Nginx配置情况
[root@cs ~]# nginx -V
nginx version: nginx/1.14.2
built by gcc 4.8.5 20150623 (Red Hat 4.8.5-36) (GCC)
built with OpenSSL 1.0.2l  25 May 2017
TLS SNI support enabled
configure arguments: --user=www --group=www --prefix=/www/server/nginx --with-openssl=/www/server/nginx/src/openssl --add-module=/www/server/nginx/src/ngx_devel_kit --add-module=/www/server/nginx/src/lua_nginx_module --add-module=/www/server/nginx/src/ngx_cache_purge --add-module=/www/server/nginx/src/nginx-sticky-module --add-module=/www/server/nginx/src/nginx-http-concat --with-http_stub_status_module --with-http_ssl_module --with-http_v2_module --with-http_image_filter_module --with-http_gzip_static_module --with-http_gunzip_module --with-stream --with-stream_ssl_module --with-ipv6 --with-http_sub_module --with-http_flv_module --with-http_addition_module --with-http_realip_module --with-http_mp4_module --with-ld-opt=-Wl,-E --with-pcre=pcre-8.40 --with-ld-opt=-ljemalloc
#开始下载Nginx,这里用的是1.15.1,你也可以下载其它的版本
wget http://nginx.org/download/nginx-1.15.1.tar.gz
tar -xzvf nginx-1.15.1.tar.gz
cd nginx-1.15.1
#下面的命令只是在上面的Nginx -v得到的配置详情后加上了--with-http_realip_module,目的是为了保持原来的配置不变同时又增加新的模块
./configure --user=www --group=www --prefix=/www/server/nginx --with-openssl=/www/server/nginx/src/openssl --add-module=/www/server/nginx/src/ngx_devel_kit --add-module=/www/server/nginx/src/lua_nginx_module --add-module=/www/server/nginx/src/ngx_cache_purge --add-module=/www/server/nginx/src/nginx-sticky-module --add-module=/www/server/nginx/src/nginx-http-concat --with-http_stub_status_module --with-http_ssl_module --with-http_v2_module --with-http_image_filter_module --with-http_gzip_static_module --with-http_gunzip_module --with-stream --with-stream_ssl_module --with-ipv6 --with-http_sub_module --with-http_flv_module --with-http_addition_module --with-http_realip_module --with-http_mp4_module --with-ld-opt=-Wl,-E --with-pcre=pcre-8.40 --with-ld-opt=-ljemalloc --with-http_realip_module
#只编译不安装
make

#先停用Nginx,然后替换新的Nginx并查看模块是否已经加载。命令如下:
mv /www/server/nginx/sbin/nginx /www/server/nginx/sbin/nginx-wzfou.backup
cp objs/nginx /www/server/nginx/sbin/nginx
nginx -V

#重启Nginx
二、Nginx设置set_real_ip_from
编译好了ngx_http_realip_module,现在我们只需要在Nginx配置文件中添加set_real_ip_from代码,示例如下:
set_real_ip_from 222.222.222.222;  #这里是需要填写具体的CDN服务器IP地址,可添加多个
set_real_ip_from 222.222.111.111;
real_ip_header  X-Forwarded-For;
real_ip_recursive on;
如果你用的是CloudFlare免费CDN,请将以下代码加入到你的Nginx配置文件当中。
location / {
 set_real_ip_from 103.21.244.0/22;
 set_real_ip_from 103.22.200.0/22;
 set_real_ip_from 103.31.4.0/22;
 set_real_ip_from 104.16.0.0/12;
 set_real_ip_from 108.162.192.0/18;
 set_real_ip_from 131.0.72.0/22;
 set_real_ip_from 141.101.64.0/18;
 set_real_ip_from 162.158.0.0/15;
 set_real_ip_from 172.64.0.0/13;
 set_real_ip_from 173.245.48.0/20;
 set_real_ip_from 188.114.96.0/20;
 set_real_ip_from 190.93.240.0/20;
 set_real_ip_from 197.234.240.0/22;
 set_real_ip_from 198.41.128.0/17;
 set_real_ip_from 199.27.128.0/21;
 set_real_ip_from 2400:cb00::/32;
 set_real_ip_from 2606:4700::/32;
 set_real_ip_from 2803:f800::/32;
 set_real_ip_from 2405:b500::/32;
 set_real_ip_from 2405:8100::/32;
 set_real_ip_from 2c0f:f248::/32;
 set_real_ip_from 2a06:98c0::/29;
 # use any of the following two
 real_ip_header CF-Connecting-IP;
 #real_ip_header X-Forwarded-For;
 }

#不要忘记重启nginx
service nginx restart
一般来说CloudFlare的IP地址是不会变的,你可以在这里找到:https://www.cloudflare.com/ips/,但是为了以防万一,wzfou.com建议设置一个自动更新CloudFlare的IP的定时任务,自动将最新的IP添加到Nginx的配置文件当中。代码如下:
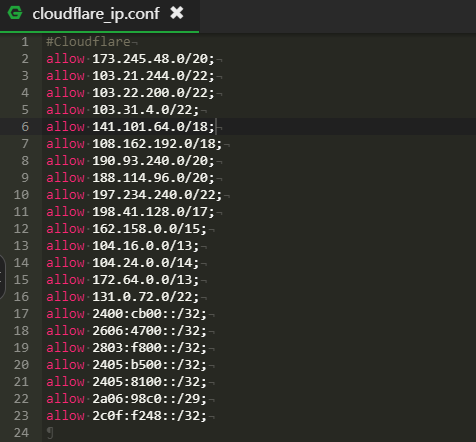
#在nginx配置目录创建cloudflare_ip.conf文件
touch /usr/local/nginx/conf/cloudflare_ip.conf
#修改原有的vhost配置,将原来第五步配置的信息改为
include cloudflare_ip.conf;
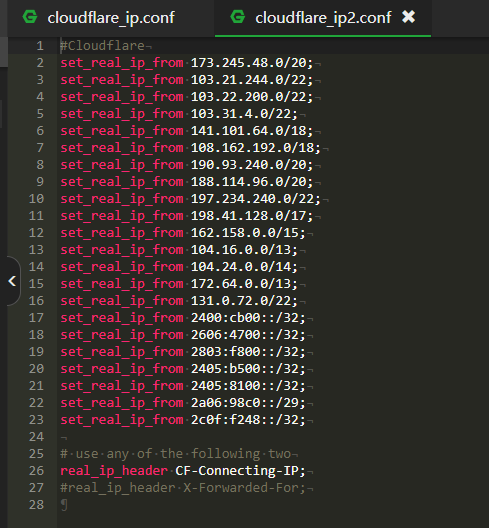
#创建自更新脚本update_cloudflare_ip.sh(假定该文件放在 /root 目录下),内容如下:
#!/bin/bash
echo "#Cloudflare" > /usr/local/nginx/conf/cloudflare_ip.conf;
for i in `curl https://www.cloudflare.com/ips-v4`; do
echo "set_real_ip_from $i;" >> /usr/local/nginx/conf/cloudflare_ip.conf;
done
for i in `curl https://www.cloudflare.com/ips-v6`; do
echo "set_real_ip_from $i;" >> /usr/local/nginx/conf/cloudflare_ip.conf;
done
echo "" >> /usr/local/nginx/conf/cloudflare_ip.conf;
echo "# use any of the following two" >> /usr/local/nginx/conf/cloudflare_ip.conf;
echo "real_ip_header CF-Connecting-IP;" >> /usr/local/nginx/conf/cloudflare_ip.conf;
echo "#real_ip_header X-Forwarded-For;" >> /usr/local/nginx/conf/cloudflare_ip.conf;
#配置crontab 每周一的上午5点更新
0 5 * * 1 /bin/bash /root/update_cloudflare_ip.sh
三、Apache配置mod_remoteip模块
3.1 apache 2.4
apache 2.4自带mod_remoteip模块不需要安装,按照下文操作:
#启用模块

vim /usr/local/apache/conf/httpd.conf

Include conf/extra/httpd-remoteip.conf

#添加如下内容
vim /usr/local/apache/conf/extra/httpd-remoteip.conf

LoadModule remoteip_module modules/mod_remoteip.so
RemoteIPHeader X-Forwarded-For
RemoteIPInternalProxy 127.0.0.1/24
#CloudFlare IP Ranges
RemoteIPInternalProxy 103.21.244.0/22
RemoteIPInternalProxy 103.22.200.0/22
RemoteIPInternalProxy 103.31.4.0/22
RemoteIPInternalProxy 104.16.0.0/12
RemoteIPInternalProxy 108.162.192.0/18
RemoteIPInternalProxy 131.0.72.0/22
RemoteIPInternalProxy 141.101.64.0/18
RemoteIPInternalProxy 162.158.0.0/15
RemoteIPInternalProxy 172.64.0.0/13
RemoteIPInternalProxy 173.245.48.0/20
RemoteIPInternalProxy 188.114.96.0/20
RemoteIPInternalProxy 190.93.240.0/20
RemoteIPInternalProxy 197.234.240.0/22
RemoteIPInternalProxy 198.41.128.0/17 #你的CDN的IP,可以重复添加

#修改日志格式,在日志格式中加上%a,然后重启apache即可

LogFormat "%h %a %l %u %t \"%r\" %>s %b \"%{Referer}i\" \"%{User-Agent}i\"" combined
LogFormat "%h %a %l %u %t \"%r\" %>s %b" common
LogFormat "%h %l %u %t \"%r\" %>s %b \"%{Referer}i\" \"%{User-Agent}i\" %I %O" combined
3.2 apache 2.2
apache 2.2需要安装mod_remoteip模块,方法如下:
wget https://github.com/ttkzw/mod_remoteip-httpd22/raw/master/mod_remoteip.c
/usr/local/apache/bin/apxs -i -c -n mod_remoteip.so mod_remoteip.c

#启用模块
vim /usr/local/apache/conf/httpd.conf

Include conf/extra/httpd-remoteip.conf

#添加如下内容,然后重启apache即可
vim /usr/local/apache/conf/extra/httpd-remoteip.conf

LoadModule remoteip_module modules/mod_remoteip.so
RemoteIPHeader X-Forwarded-For
RemoteIPInternalProxy 127.0.0.1 #你的CDN的IP,可以重复添加
四、网站仅允许Cloudflare CDN的IP访问
上面我们是通过安装ngx_http_realip_module和mod_remoteip模块获取到了用户真实的IP地址,但是有的时候我们需要借助Cloudflare 的安全防护功能来防止CC或者DDoS攻击,即仅允许Cloudflare CDN的IP访问我们的访问。
Nginx直接拒绝和允许IP访问代码示例如下:
location / {
    deny  192.168.1.1;
    allow 192.168.1.0/24;
    allow 10.1.1.0/16;
    allow 2001:0db8::/32;
    #Railgun IP
    deny  all;
}
如果我们仅允许Cloudflare CDN的IP访问网站,我们可以直接在nginx配置中将Cloudflare CDN的IP添加到允许的范围内。
#直接加入
# https://www.cloudflare.com/ips
# IPv4
allow 103.21.244.0/22;
allow 103.22.200.0/22;
allow 103.31.4.0/22;
allow 104.16.0.0/12;
allow 108.162.192.0/18;
allow 131.0.72.0/22;
allow 141.101.64.0/18;
allow 162.158.0.0/15;
allow 172.64.0.0/13;
allow 173.245.48.0/20;
allow 188.114.96.0/20;
allow 190.93.240.0/20;
allow 197.234.240.0/22;
allow 198.41.128.0/17;

# IPv6
allow 2400:cb00::/32;
allow 2405:8100::/32;
allow 2405:b500::/32;
allow 2606:4700::/32;
allow 2803:f800::/32;
allow 2c0f:f248::/32;
allow 2a06:98c0::/29;
自动更新Cloudflare CDN的IP。手动添加Cloudflare CDN的IP到Nginx配置当中简单方便,但是一旦Cloudflare CDN的IP有变化时还得自己手动处理,我们可以创建一个脚本,定时去更新Cloudflare CDN的IP,自动添加到Nginx配置中,代码如下:
touch /usr/local/nginx/conf/allow_ip.conf
#修改网站nginx配置,加入以下代码:
include /usr/local/nginx/conf/allow_ip.conf;

vim /data/script/allow_cf_ip.sh
#!/bin/bash
echo "#Cloudflare" > /usr/local/nginx/conf/allow_ip.conf;
for i in `curl https://www.cloudflare.com/ips-v4`; do
     echo "allow $i;" >> /usr/local/nginx/conf/allow_ip.conf;
done
for i in `curl https://www.cloudflare.com/ips-v6`; do
       echo "allow $i;" >> /usr/local/nginx/conf/allow_ip.conf;
done


#添加定时任务
0 5 * * 1 /bin/bash /data/script/allow_cf_ip.sh
五、总结
使用了CDN加速后,我们的网站获取到的用户IP变成了CDN的IP了,想要获取到用户的真实IP就得利用Nginx和Apache的模式功能。当然,如果你用的是PHP,例如Wordpress,直接将以下代码加入到你的Wordpress配置文件当中即可。
if(isset($_SERVER['HTTP_X_FORWARDED_FOR']))
{
$list = explode(‘,’,$_SERVER['HTTP_X_FORWARDED_FOR']);
$_SERVER['REMOTE_ADDR'] = $list[0];
}
这里还要特别提醒一下,如果你启用了Cloudflare Railgun动态加速(挖站否的Cloudflare Partner接入管理就提供此免费服务),记得将Railgun的服务器IP加入到配置当中,因为启用了Railgun后网站获取到的IP地址都来自Railgun服务器上的。
文章出自:挖站否 https://wzfou.com/cdn-real-ip/,部分内容参考自:rhilip、nova版权所有。本站文章除注明出处外,皆为作者原创文章,可自由引用,但请注明来源。


关于站长(Qi),2008年开始混迹于免费资源圈中,有幸结识了不少的草根站长。之后自己摸爬滚打潜心学习Web服务器、VPS、域名等,兴趣广泛,杂而不精,但愿将自己经验与心得分享出来与大家共勉。


猜你喜欢


-
-

引用没有问题,看错误应该是代码有重复,你的完成配置代码有吗?
2022年3月26日 16:33-

#下面2行的中的wpcache路径请自行提前创建,否则可能会路径不存在而无法启动nginx,max_size请根据分区大小自行设置
fastcgi_cache_path /tmp/wpcache levels=1:2 keys_zone=WORDPRESS:250m inactive=1d max_size=1G;
fastcgi_temp_path /tmp/wpcache/temp;
fastcgi_cache_key “$scheme$request_method$host$request_uri”;
fastcgi_cache_use_stale error timeout invalid_header http_500;
#忽略一切nocache申明,避免不缓存伪静态等
fastcgi_ignore_headers Cache-Control Expires Set-Cookie;
#Ps:如果是多个站点,以上内容不要重复添加,否则会冲突,可以考虑将以上内容添加到nginx.conf里面,避免加了多次。server
{
listen 80;
listen 443 ssl http2;
server_name aaaa.com http://www.aaaa.com;
index index.php index.html index.htm default.php default.htm default.html;
root /www/wwwroot/aaaa.com;#SSL-START SSL相关配置,请勿删除或修改下一行带注释的404规则
#error_page 404/404.html;
#HTTP_TO_HTTPS_START
if ($server_port !~ 443){
rewrite ^(/.*)$ https://$host$1 permanent;
}
#HTTP_TO_HTTPS_END
ssl_certificate /www/server/panel/vhost/cert/aaaa.com/fullchain.pem;
ssl_certificate_key /www/server/panel/vhost/cert/aaaa.com/privkey.pem;
ssl_protocols TLSv1.1 TLSv1.2 TLSv1.3;
ssl_ciphers EECDH+CHACHA20:EECDH+CHACHA20-draft:EECDH+AES128:RSA+AES128:EECDH+AES256:RSA+AES256:EECDH+3DES:RSA+3DES:!MD5;
ssl_prefer_server_ciphers on;
ssl_session_cache shared:SSL:10m;
ssl_session_timeout 10m;
add_header Strict-Transport-Security “max-age=31536000”;
error_page 497 https://$host$request_uri;#SSL-END
#引用重定向规则,注释后配置的重定向&&将无效
include /www/server/panel/vhost/nginx/redirect/aaaa.com/*.conf;#ERROR-PAGE-START 错误页配置,可以注释、删除或修改
#error_page 404 /404.html;
#error_page 502 /502.html;
#ERROR-PAGE-END#PHP-INFO-START PHP引用配置,可以注释或修改
include enable-php-74.conf;
#PHP-INFO-END#REWRITE-START URL重写规则引用,修改后将导致面板设置的伪静态规则失效
include /www/server/panel/vhost/rewrite/aaaa.com.conf;
#REWRITE-END#更新Cloudflare CDN IP并获取真实IP
include /data/conf/cloudflare_ip2.conf;
#隐藏源站,更新Cloudflare CDN IP并允许访问
include /data/conf/cloudflare_ip.conf;#禁止访问的文件或目录
location ~ ^/(\.user.ini|\.htaccess|\.git|\.svn|\.project|LICENSE|README.md)
{
return 404;
}#一键申请SSL证书验证目录相关设置
location ~ \.well-known{
allow all;
}location ~ .*\.(gif|jpg|jpeg|png|bmp|swf)$
{
expires 30d;
error_log /dev/null;
access_log /dev/null;
}location ~ .*\.(js|css)?$
{
expires 12h;
error_log /dev/null;
access_log /dev/null;
}
#fastcgi_cache缓存-配置
set $skip_cache 0;
#post访问不缓存
if ($request_method = POST) {
set $skip_cache 1;
}
#动态查询不缓存
if ($query_string != “”) {
set $skip_cache 1;
}
#后台等特定页面不缓存(其他需求请自行添加即可)
if ($request_uri ~* “/wp-admin/|/xmlrpc.php|wp-.*.php|/feed/|index.php|sitemap(_index)?.xml”) {
set $skip_cache 1;
}
#对登录用户、评论过的用户不展示缓存
if ($http_cookie ~* “comment_author|wordpress_[a-f0-9]+|wp-postpass|wordpress_no_cache|wordpress_logged_in”) {
set $skip_cache 1;
}
#这里请参考你网站之前的配置,特别是sock的路径,弄错了就502了!我的是PHP7.4
location ~ [^/].php(/|$)
{
try_files $uri =404;
fastcgi_pass unix:/tmp/php-cgi-74.sock;
fastcgi_index index.php;
include fastcgi.conf;
add_header Strict-Transport-Security “max-age=63072000; includeSubdomains; preload”;
#新增的缓存规则
fastcgi_cache_bypass $skip_cache;
fastcgi_no_cache $skip_cache;
add_header X-Cache “$upstream_cache_status From $host”;
fastcgi_cache WORDPRESS;
add_header Cache-Control max-age=0;
add_header Nginx-Cache “$upstream_cache_status”;
add_header Last-Modified $date_gmt;
add_header X-Frame-Options SAMEORIGIN; # 只允许本站用 frame 来嵌套
add_header X-Content-Type-Options nosniff; # 禁止嗅探文件类型
add_header X-XSS-Protection “1; mode=block”; # XSS 保护
etag on;
fastcgi_cache_valid 200 301 302 1d;
}#缓存清理配置(可选模块,请细看下文说明)
location ~ /purge(/.*) {
allow 127.0.0.1;
allow “122.122.122.122”;#这里我替换成其他IP
deny all;
fastcgi_cache_purge WORDPRESS “$scheme$request_method$host$1”;
}
access_log /www/wwwlogs/aaaa.com.log;
error_log /www/wwwlogs/aaaa.com.error.log;
}2022年3月26日 17:19 -
你好,帮我看看2022年3月26日 17:21-
仔细看了一下好像没有发现问题。
试试:nginx -t来检查一下,看看有没有详细的报错?2022年3月26日 23:42-
nginx: the configuration file /www/server/nginx/conf/nginx.conf syntax is ok
nginx: configuration file /www/server/nginx/conf/nginx.conf test is successful
谢谢站长大大了!没问题就好。整了一天网站也没出现问题。希望以后有人遇到这问题的,debug出来结果。我对建站和linux这些还是不太会调试。2022年3月26日 23:59
-
-
-
-
-

感谢分享!最后那段代码加入到 wp-config.php 配置文件中,貌似不起作用,日志里显示的仍是CF地址。
PS. 虚拟主机-Apache2.4if(isset($_SERVER[‘HTTP_X_FORWARDED_FOR’]))
{
$list = explode(‘,’,$_SERVER[‘HTTP_X_FORWARDED_FOR’]);
$_SERVER[‘REMOTE_ADDR’] = $list[0];
}2021年10月5日 11:04-
那应该是虚拟主机不支持真实IP,这个功能需要Apache或者Nginx安装相应的模块。
2021年10月6日 08:28
-
-

请问可以加个qq询问你吗?
2019年5月30日 20:26-
可以的:798558110
2019年5月31日 11:11
-
-

启用CloudFlare后WHMCS不论前台后台,登陆后30s左右cookei就失效了需要重新登录,后台很多操作就是一直弹登录,是这个原因造成的么[衰]
2019年4月29日 16:30-
不是,只要在WHMCS设置中将禁用 Session IP 检查开启就可以了。
2019年4月30日 17:43-
已经弄好了,还是谢谢大佬[衰]
2019年4月30日 18:00
-
-
-

set_real_ip_from 222.222.111.111;
real_ip_header X-Forwarded-For;
real_ip_recursive on;
这个具体是加在哪个位置,宝塔面板2019年4月2日 08:20-
Nginx配置文件,在宝塔后台选择网站,然后点击该网站就可以看到Nginx配置了。
2019年4月2日 08:50-
我是说……具体的……我弄好了是在
server
{
listen 80;
listen 443 ssl http2;
这个部分,因为网站配置有一堆我开始没弄清楚填到啥地方,已经解决了2019年4月2日 09:01-
嗯,对的。
2019年4月2日 10:26-

我直接添加在nginx.conf的http段落里面可以吗?
2019年7月27日 00:06
-
-
-
-
-

Oneinstack用的OpenResty怎么编译鸭[威武]
2019年3月22日 15:45-
搞定了。
2019年3月22日 15:54
-
-

[可怜]有个cpanel的虚拟主机,他服务器应该是apache组件的;
都是CF的IP,不知道能不能获取真实IP,添加进htaccess文件之类的代码2019年3月16日 05:00-
cpanel有服务器日志,在那里可以获得到真实的IP地址。
2019年3月19日 16:51
-
-

cloudflare防御效果不错,节点ip段添加也很方便
2019年3月11日 16:16 -

模块处理效率最好。
2019年3月11日 09:41 -

WordPress最方便了,一段代码就搞定了。
2019年3月11日 08:57 -

学习了,好文
2019年3月10日 18:32
你好,我是宝塔面板,已经重新编译nginx并配置。加入了文章中的两段脚本文件conf,虽然网站可以访问但是会出现第二张图的错误。 并且我尝试在nginx配置中把这两段Include包含在“location / {}”中,或者只是单独在隐藏真实IP的那段脚本Include后面添加“deny all;”网站就无法访问。请问我只是用Include导入是否正确。还有现在第二个我百度后尝试过kill所有nginx使用的端口重启还是有这个错误。[熊猫]

